I don’t know what the name of this quilt will be yet, but I had to name it something for now!
I had bought a layer cake of Sweet Grass Prairie from Connecting Threads, because I thought I’d like the grouping and wanted to make something from it, perhaps some applique I was thinking at the time.
Then I decided I wanted to use it for my niece’s quilt. I ended up drawing, well, let’s say 100 quilts! on EQ, using variations of so many blocks that I lost track of where I got what idea. I didn’t start with any particular published pattern, but I will say that as there are only so many ways to cut up a layer cake, so any similarity to any other published pattern is coincidental.
Here it is! I’ll give some directions, but I haven’t had much practice in writing directions, so hopefully they will still be helpful.
Start by with one dark and one light 10″ square..
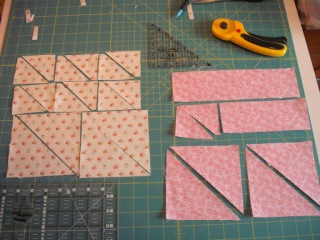
The light will make two blocks…cut two 5″ squares, each cut in half on the diagonal; cut 2 – 2/12″ strips. From the 2 1/2″ strips, cut 12 half square triangles using the easy angle ruler. If you don’t have one of these…get one!, ha ha, they are so useful. Two of the triangles from the 5″ square and 6 of the 2 1/2″ triangles will make one block. (If you can’t use an easy angle ruler, or one similar, you will have tocut a strip 2 7/8″ wide, instead of the two – 2 1/2″ strips; then cut three – 2 7/8″ squares, cut in half diagonally; for each block, so you will only be able to make one block from one layer cake square)
From the dark, cut two 5″ squares, each cut in half on the diagonal. Cut 2 – 2 1/2″ strips. From one strip, cut 2 triangles using the easy angle ruler. The remainder of the 2 1/2″ strips are for the border.
Sew 2 small half square triangles using the light and dark. Press to the dark. Sew a light triangle to either side of this square so it looks like this, pressing to the small light triangle..
Sew 2 large half square triangles, press to the dark. Sew a dark triangle to each pieced triangle, to form a square. Square up each unit to 4 1/2″. There will be very little trimming. Use the diagonal line on your ruler to make sure the diagonal seam on the square runs from corner to corner. Additionally, when squaring up the pieced half square triangle, make sure the 2 1/4″ point is at the corner of small hst, as shown below.


